Web Server
Webサーバー関連
Apacheについて
仮想(Virtual)ドメインを使って運用している場合、必要ない仮想ドメインは、ディレクトや設定ファイルをすべて削除もしくは移動させて、apacheを再起動させます。 中途半端な状態で運用していると、内部でエラーがたまってApacheのパフォーマンスに影響する場合もありえるので、必ず、必要ない設定ファイルは削除しましょう。
SSLについて
DebianにOpenSSLをインストールする手順 参考サイト ここから
アクセスログについて
・PiWik
Debianにアクセスログ(Piwik)をインストールする手順 参考サイト ここから
piwikはオープンソースのWEBサイトアクセス解析ツールです。
http://www.piwikjapan.org/ 日本のユーザーグループ
Debianへのインストール
Debianのパッケージではなくソースからダウンロードしてインストールしてみました。
- MySQLデータベースでPiWik用のデータベースを作成、接続ユーザーとその権限を設定
- Webサーバーからアクセスできるディレクトリ作成、パーミッション設定
- そのディレクトリにPiWikソースプログラムをダウンロード
- wget https://builds.piwik.org/piwik.zip
- ZIPファイルを解凍しApacheでアクセスできるパーミッションの設定
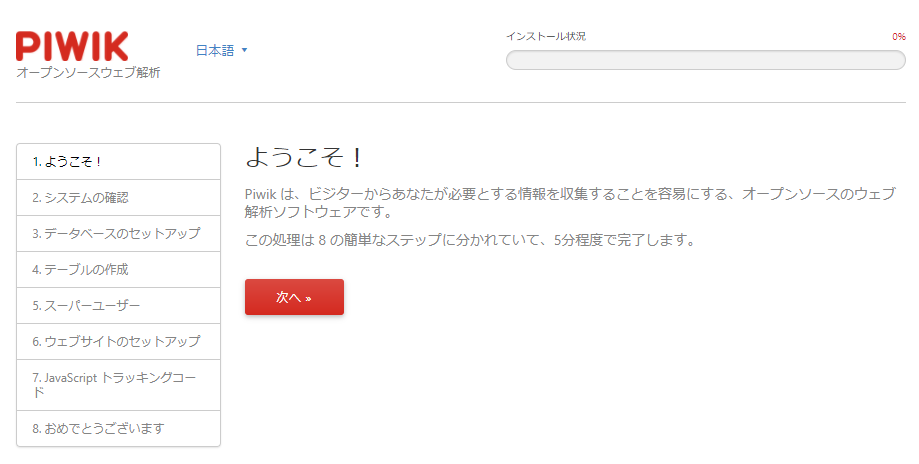
- ブラウザからインストール実行
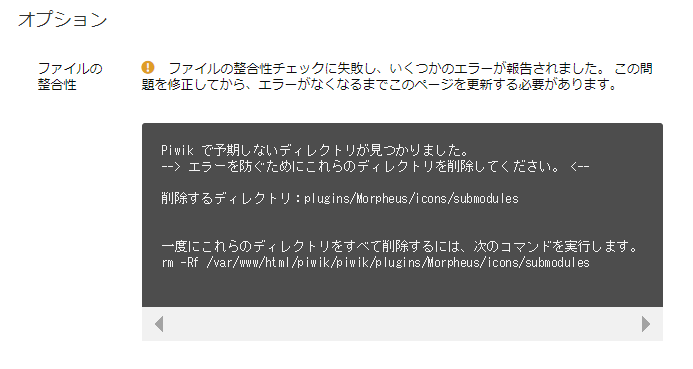
以下のワーニングが表示されるので、plugins/Morpheus/icons/submodules を削除します。
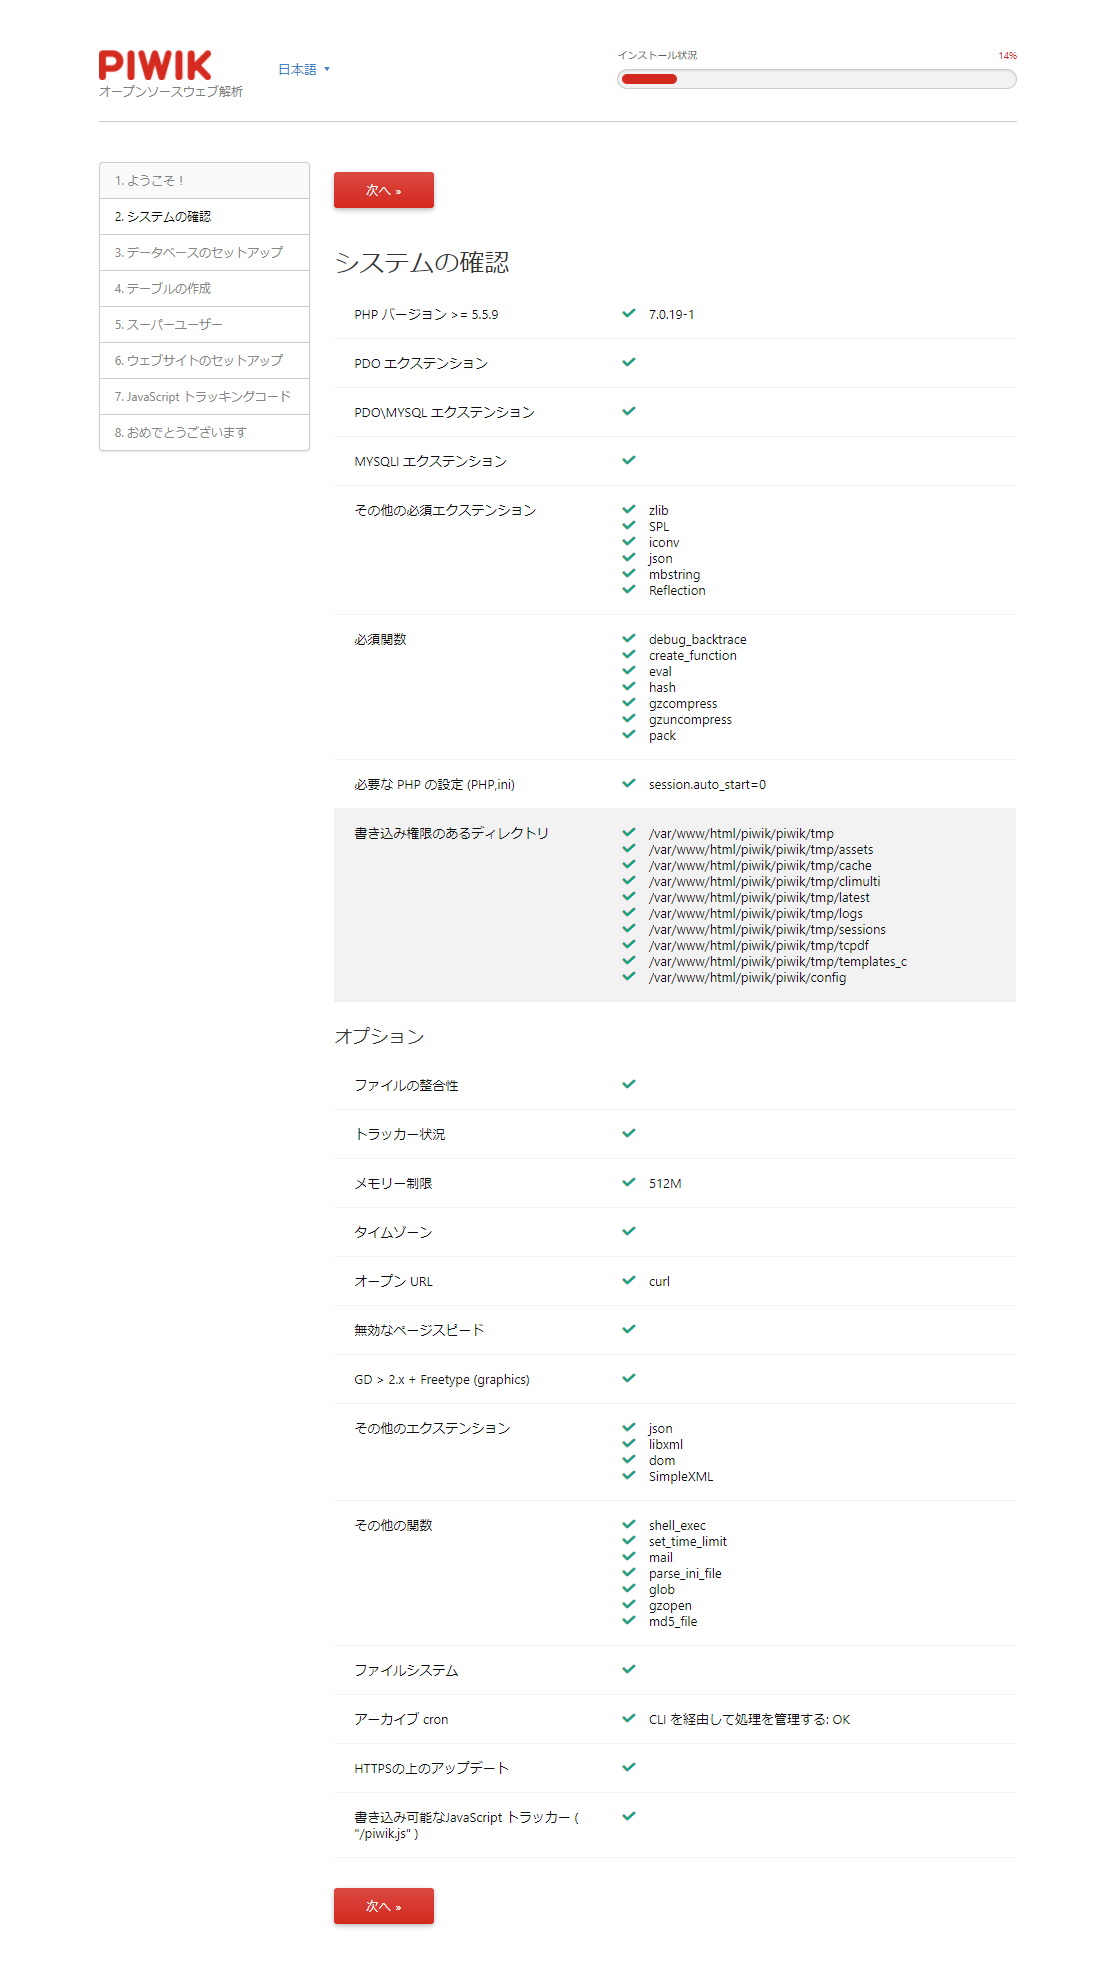
インストール環境の確認
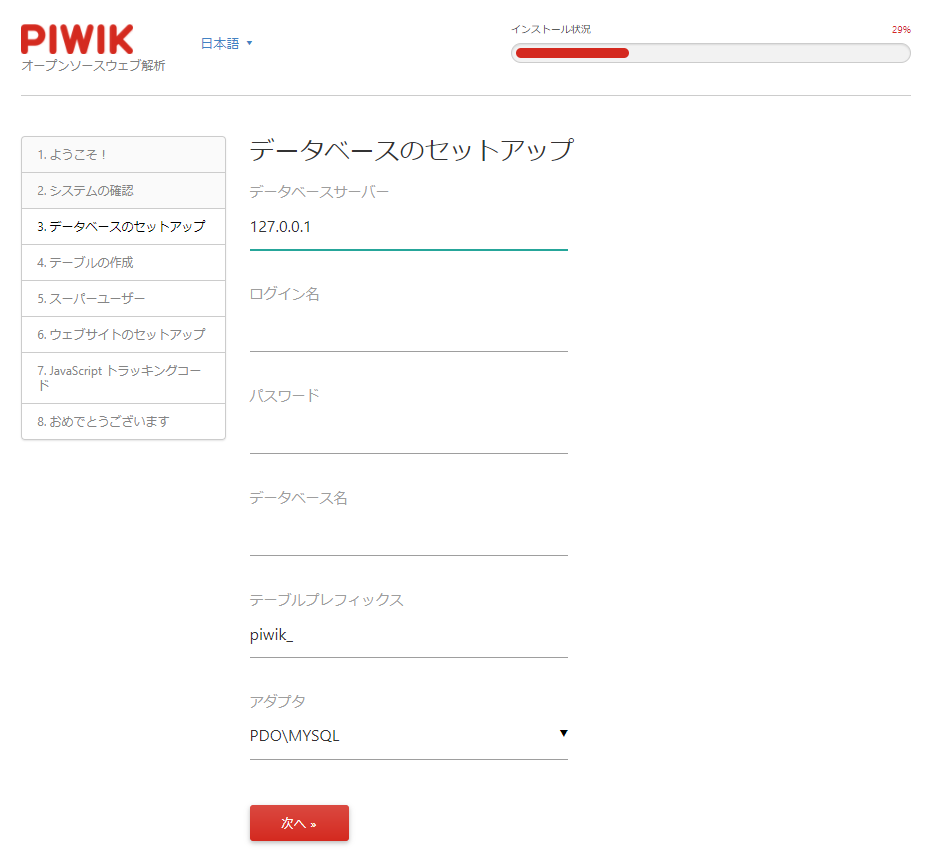
データベースの設定、事前にPiWik用のデータベース名、そのユーザーと権限を設定しておきましょう。
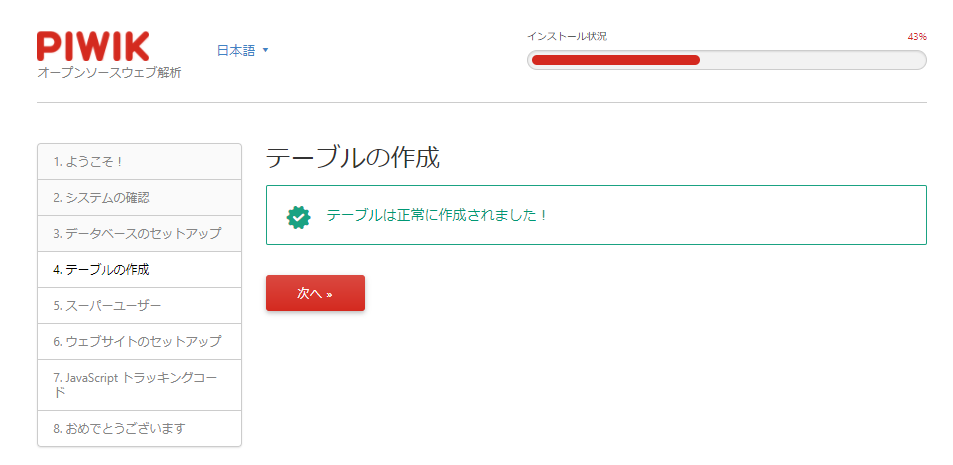
データベースのテーブル作成
PiWikの管理画面にログインするユーザー名、パスワード、メールアドレスを登録
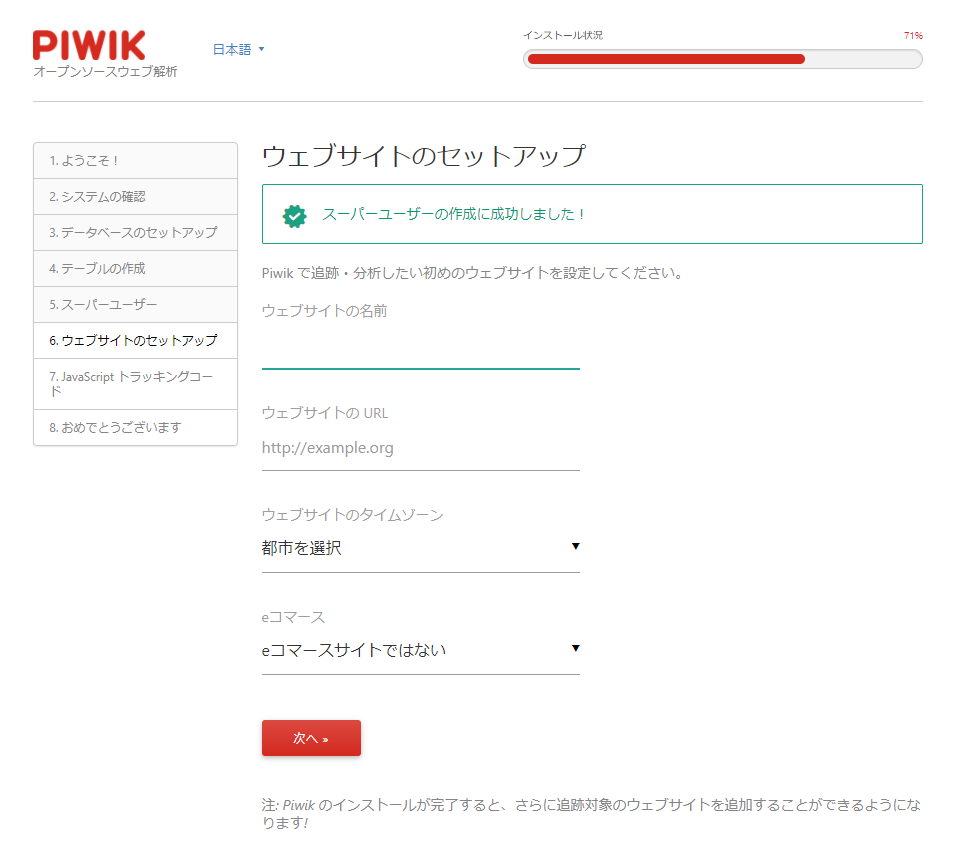
アクセス記録をする対象のWebサイトを設定します。 複数のWebサイトを登録管理可能。
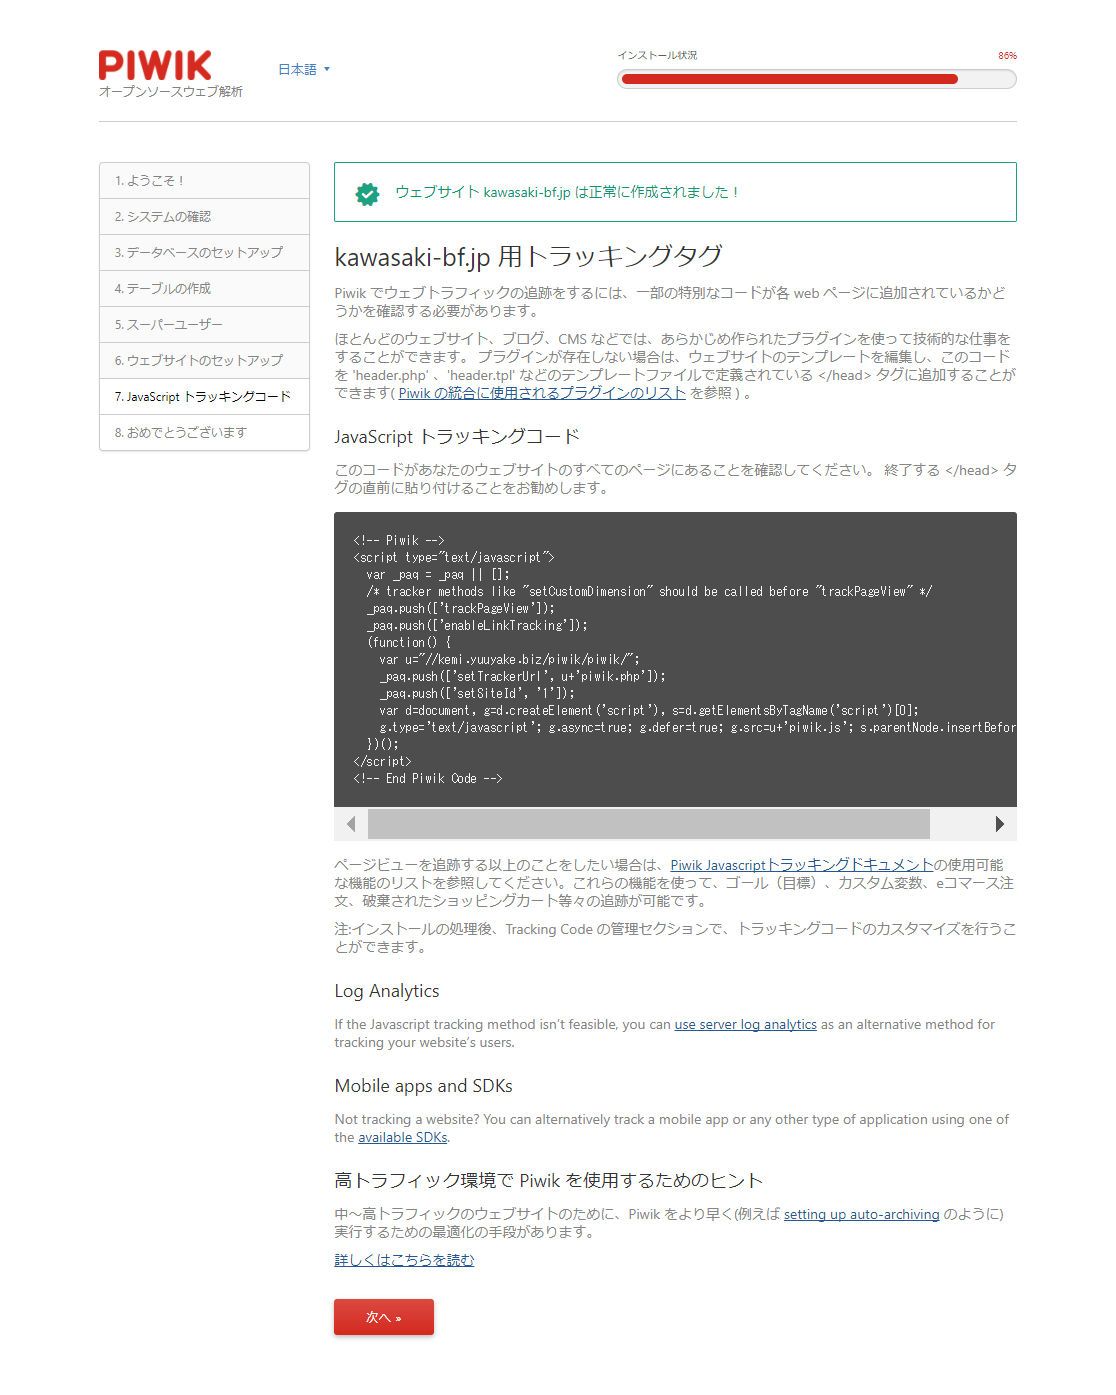
PiWilのトラッキングスクリプトについて CMSのモジュール(DrupalのPiwik Web Analyticsなど)は自動的にモジュール側の設定を行なうことでこのスクリプトを追加します。
インストールできました
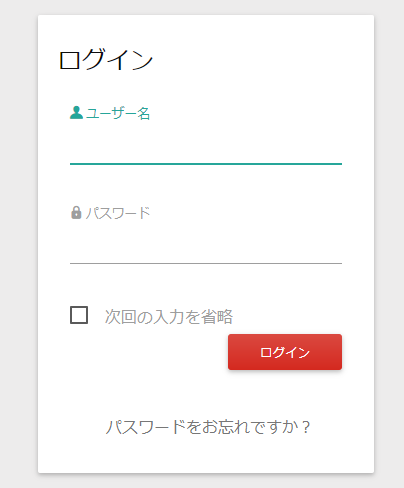
PiWikをインストールしたURLにアクセスして管理画面にログインします
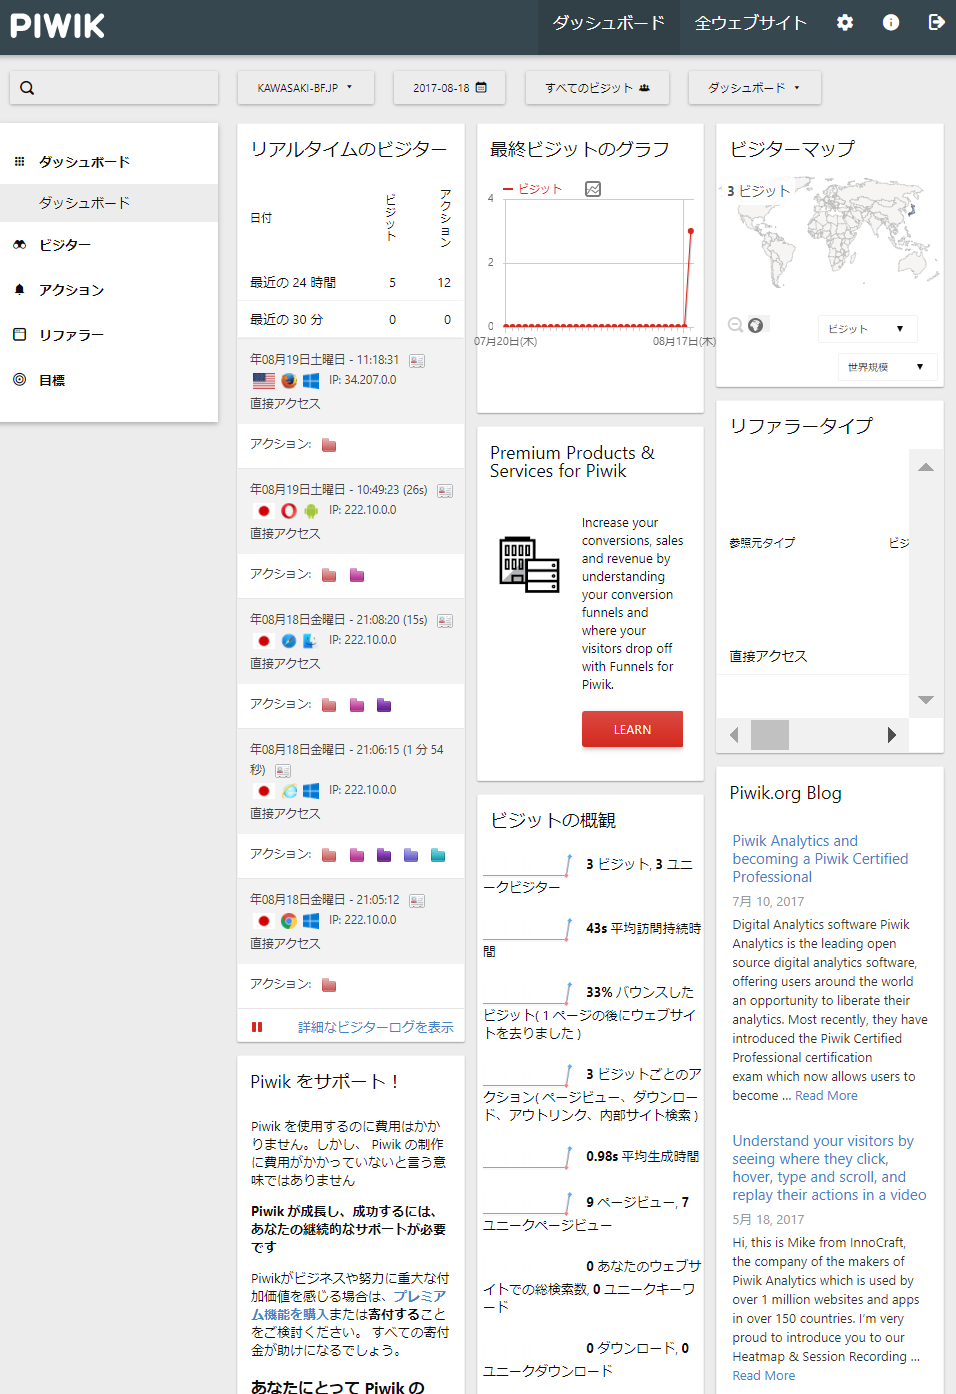
ログイン後のダッシュボード画面
Nginx
Nginx Webサーバー
概要:
Faq
Q: Nginxで仮想ドメインを設定する場合は
A: Nginxの設定ファイル /etc/nginx/sites-avaiable/www.example.com.conf を作成し、設定を追加する。
server {
      listen 80;
      listen [::]:80;
      server_name www.example.com;

      root /usr/share/nginx/html/;

      location ~ /.well-known/acme-challenge {
         allow all;
      }
}
サイトのホームディレクトリを作成 sudo mkdir -p /usr/share/nginx/html/
Nginxを再起動 sudo systemctl reload nginx
Q: NginxでPHP7.4を設定する場合は
A: Nginxの設定ファイル /etc/nginx/sites-avaiable/www.example.com.conf を作成し、設定を追加する。
server {
   listen 80;
   listen [::]:80;
   server_name www.example.com;

   root /var/www/example/;
   index index.php index.html;

   access_log /var/log/nginx/example_access.log;
   error_log /var/log/nginx/example_error.log;

   location / {
       try_files $uri $uri/ /index.php;
   }

   location ~ ^/(.+\.php)$ {
        try_files $uri =404;
        fastcgi_pass unix:/run/php/php7.4-fpm.sock;
        fastcgi_index index.php;
        fastcgi_param SCRIPT_FILENAME $document_root$fastcgi_script_name;
        include /etc/nginx/fastcgi_params;
   }
}
サイトのホームディレクトリを作成 sudo mkdir -p /var/www/example
Nginxを再起動 sudo systemctl reload nginx
Q: ページにアクセスして、文書ファイルなどのリンクをクリックすると、403エラー「Forbidden」が表示されるので、そのテキストファイルなどを表示させたい場合は。
A: Nginxの設定ファイル /etc/nginx/sites-avaiable/xxxx.conf に以下のlocation設定を追加する。以下の/sites/default/files/ は オープンソースCMS、Drupal 8の標準ファイルディレクトリの場合です。環境に合わせて調整してください。
location ~ ^/sites/default/files/ {
        allow all;
    }
Q: ファイルのアップロードサイズを変更しするには?
A: /etc/nginx/nginx.conf を編集します。 環境に合わせて調整してください。 参考にしたサイトは:https://docs.rackspace.com/support/how-to/limit-file-upload-size-in-nginx/
Edit the /etc/nginx/nginx.conf file to increase the limit of the files to upload:

http:
http {
... client_max_body_size 100M;
 }

server:
server {
... client_max_body_size 100M;
 }

location:
location /uploads {
... client_max_body_size 100M;
 }
Niginxの再起動です
Q: リバースプロシキーでNode.jsベースのアプリを設定する場合
A: /etc/nginx/sites-available サイト名.conf を編集します。 ポート80とポート443のどちらにも設定しました。サイト名.confファイルの保存先や内容は環境に合わせて調整してください。 参考にしたサイトは:https://tech-waplus.com/programming/20190410-nginx-node-js-web/
server {
        client_max_body_size 100M;
        listen  80;
        server_name     サイトドメイン名;
        location / {
            proxy_pass http://localhost:30xx;
            proxy_http_version 1.1;
            proxy_set_header Upgrade $http_upgrade;
            proxy_set_header Connection keep-alive;
            proxy_set_header Host $host;
            proxy_cache_bypass $http_upgrade;

            client_max_body_size 100M;
        }
}
server {
        client_max_body_size 100M;
        listen  443 ssl;
        server_name     サイトドメイン名;
        location / {
            proxy_pass http://localhost:30xx;
            proxy_http_version 1.1;
            proxy_set_header Upgrade $http_upgrade;
            proxy_set_header Connection keep-alive;
            proxy_set_header Host $host;
            proxy_cache_bypass $http_upgrade;

            client_max_body_size 100M;
        }
}
A: 別のNginxのリバーズプロシキーの設定について
出典: https://docs.graylog.org/docs/web-interface#configuring-webif-nginx
- 192.168.0.10:80から127.0.0.1:9000に接続を転送するようにロードバランサーを構成します。
- 通常どおりxxxサーバーを起動します。
- httpのWebインターフェイス http://xxx.example.org にアクセスします。
HTTPの場合:
server
{
    listen 80 default_server;
    listen [::]:80 default_server ipv6only=on;
    server_name xxx.example.org;

    location / {
      proxy_set_header Host $http_host;
      proxy_set_header X-Forwarded-Host $host;
      proxy_set_header X-Forwarded-Server $host;
      proxy_set_header X-Forwarded-For $proxy_add_x_forwarded_for;
      proxy_set_header X-xxx-Server-URL http://$server_name/;
      proxy_pass       http://127.0.0.1:9000;
    }
}
NGINXはSSLターミネーションに使用できます。サーバーのlistendirectiveを変更し、証明書に関するすべての情報を追加するだけで済みます。 複数のxxxサーバーを実行している場合は、HTTPSを使用することをお勧めします。
HTTPSの場合:
server
{
    listen      443 ssl http2;
    server_name graylog.example.org;
    # <- your SSL Settings here!

    location /
    {
      proxy_set_header Host $http_host;
      proxy_set_header X-Forwarded-Host $host;
      proxy_set_header X-Forwarded-Server $host;
      proxy_set_header X-Forwarded-For $proxy_add_x_forwarded_for;
      proxy_set_header X-Graylog-Server-URL https://$server_name/;
      proxy_pass       http://127.0.0.1:9000;
    }
}
1つのドメイン名で複数の異なるアプリケーションを提供する場合は、パスプレフィックスを使用してxxxWebインターフェイスを提供することもできます。
HTTPを使用したパスプレフィックスの下でのプロキシWebインターフェイスとAPIトラフィックの場合
server
{
    listen 80 default_server;
    listen [::]:80 default_server ipv6only=on;
    server_name applications.example.org;

    location /graylog/
    {
      proxy_set_header Host $http_host;
      proxy_set_header X-Forwarded-Host $host;
      proxy_set_header X-Forwarded-Server $host;
      proxy_set_header X-Forwarded-For $proxy_add_x_forwarded_for;
      proxy_set_header X-Graylog-Server-URL http://$server_name/graylog/;
      rewrite          ^/graylog/(.*)$  /$1  break;
      proxy_pass       http://127.0.0.1:9000;
    }
}
これにより、xxxの設定が次のURLで利用できるようになります。
Webインターフェース: http://applications.example.org/xxx/
REST API: http://applications.example.org/xxx/api/
Q: オープンソースCMS Drupal をNginxで運用する場合の設定方法は
A: /etc/nginx/sites-avaiable/サイト名.conf を編集します。 環境に合わせて調整してください。
### --> for Drupal 8

location = /favicon.ico {
        log_not_found off;
        access_log off;
    }

    location = /robots.txt {
        allow all;
        log_not_found off;
        access_log off;
    }

    # Very rarely should these ever be accessed outside of your lan
    location ~* \.(txt|log)$ {
        allow 192.168.0.0/16;
        deny all;
    }

    location ~ \..*/.*\.php$ {
        return 403;
    }

    location ~ ^/sites/.*/private/ {
        return 403;
    }


location ~ (^|/)\. {
        return 403;
    }

    location / {
        # try_files $uri @rewrite; # For Drupal <= 6
        try_files $uri /index.php?$query_string; # For Drupal >= 7
    }

    location @rewrite {
        rewrite ^/(.*)$ /index.php?q=$1;
    }


# location ~ '\.php$|^/update.php' {
#        fastcgi_split_path_info ^(.+?\.php)(|/.*)$;
#        #NOTE: You should have "cgi.fix_pathinfo = 0;" in php.ini
#        include fastcgi_params;
#        include snippets/fastcgi-php.conf;
#        fastcgi_param SCRIPT_FILENAME $request_filename;
#        fastcgi_intercept_errors on;
#        fastcgi_pass unix:/run/php/php7.0-fpm.sock;
#    }

 location ~ ^/sites/.*/files/styles/ { # For Drpal >= 7
        try_files $uri @rewrite;
    }

    location ~* \.(js|css|png|jpg|jpeg|gif|ico)$ {
        expires max;
        log_not_found off;
    }

### <--- end Drupal 8
Niginxの再起動です
A: 別の設定方法
出典: https://www.itzgeek.com/how-tos/linux/ubuntu-how-tos/install-drupal-with...
PHP8.1のインストール(Ubuntu 22.04) 出典: https://www.itzgeek.com/how-tos/linux/ubuntu-how-tos/install-lemp-stack-...
PHP FastCGI Process Manager (FPM)でインストール
sudo apt install -y php-fpm php-mysql php-cli
もし、公式のNginxリポジトリからNginxをインストールした場合は、PHPUnixソケットの所有権とグループをnginxに変更する必要があります。
sudo sed -i 's/listen.owner \= www-data/listen.owner \= nginx/g' /etc/php/8.1/fpm/pool.d/www.conf
sudo sed -i 's/listen.group \= www-data/listen.group \= nginx/g' /etc/php/8.1/fpm/pool.d/www.conf
仮想ドメインでNginxを設定
server {
server_name itzgeek.local www.xxx.xxx;
root /usr/share/nginx/html/www.xxx.xxx;
location / {
index index.html index.htm index.php;
}
location ~ \.php$ {
include /etc/nginx/fastcgi_params;
fastcgi_pass unix:/run/php/php8.1-fpm.sock;
fastcgi_index index.php;
fastcgi_param SCRIPT_FILENAME $document_root$fastcgi_script_name;
}
}
ドキュメントルートを作成
sudo mkdir /usr/share/nginx/html/www.xxx.xxx
Nginxの再起動
sudo systemctl restart nginx
sudo systemctl restart php8.1-fpm
PHP8の追加モジュール
sudo apt install -y php-mysql php-gd php-dom php-curl php-imagick php-zip php-xml php-mbstring php-json php-pdo php-cli php-apcu

sudo apt install --no-install-recommends -y php-uploadprogress
編集 php.ini (設定数値は環境に合わせて調整します。)
memory_limit = 256M
upload_max_filesize = 64M
post_max_size = 64M
realpath_cache_size = 256k
realpath_cache_ttl = 3600
server_name , root, fastcgi_pass は環境に合わせて調整します。
server {
server_name itzgeek.net www.xxx.net;
root /usr/share/nginx/www.xxx.net/html;
index index.php index.html;
access_log /usr/share/nginx/www.xxx.net/logs/access.log;
error_log /usr/share/nginx/www.xxx.net/logs/error.log;
location = /favicon.ico {
log_not_found off;
access_log off;
}
location = /robots.txt {
allow all;
log_not_found off;
access_log off;
}
location ~* \.(txt|log)$ {
deny all;
}
location ~ \..*/.*\.php$ {
return 403;
}
location ~ ^/sites/.*/private/ {
return 403;
}
# Block access to scripts in site files directory
location ~ ^/sites/[^/]+/files/.*\.php$ {
deny all;
}
# Allow "Well-Known URIs" as per RFC 5785
location ~* ^/.well-known/ {
allow all;
}
# Block access to "hidden" files and directories whose names begin with a
# period. This includes directories used by version control systems such
# as Subversion or Git to store control files.
location ~ (^|/)\. {
return 403;
}
location / {
try_files $uri /index.php?$query_string; # For Drupal >= 7
}
location @rewrite {
rewrite ^ /index.php; # For Drupal >= 7
}
# Don't allow direct access to PHP files in the vendor directory.
location ~ /vendor/.*\.php$ {
deny all;
return 404;
}
# Protect files and directories from prying eyes.
location ~* \.(engine|inc|install|make|module|profile|po|sh|.*sql|theme|twig|tpl(\.php)?|xtmpl|yml)
(~|\.sw[op]|\.bak|\.orig|\.save)?$|^(\.(?!well-known).*|Entries.*|Repository|Root|Tag|Template|composer\.(json|lock)
|web\.config)$|^#.*#$|\.php(~|\.sw[op]|\.bak|\.orig|\.save)$ {
deny all;
return 404;
}
location ~ '\.php$|^/update.php' {
fastcgi_split_path_info ^(.+?\.php)(|/.*)$;
try_files $fastcgi_script_name =404;
include fastcgi_params;
fastcgi_param HTTP_PROXY "";
fastcgi_param SCRIPT_FILENAME $document_root$fastcgi_script_name;
fastcgi_param PATH_INFO $fastcgi_path_info;
fastcgi_param QUERY_STRING $query_string;
fastcgi_intercept_errors on;
fastcgi_pass unix:/var/run/php/php8.1-fpm.sock;
}
location ~* \.(js|css|png|jpg|jpeg|gif|ico|svg)$ {
try_files $uri @rewrite;
expires max;
log_not_found off;
}
# Fighting with Styles? This little gem is amazing.
location ~ ^/sites/.*/files/styles/ { # For Drupal >= 7
try_files $uri @rewrite;
}
# Handle private files through Drupal. Private file's path can come
# with a language prefix.
location ~ ^(/[a-z\-]+)?/system/files/ { # For Drupal >= 7
try_files $uri /index.php?$query_string;
}
# Enforce clean URLs
# Removes index.php from urls like www.example.com/index.php/my-page --> www.example.com/my-page
# Could be done with 301 for permanent or other redirect codes.
if ($request_uri ~* "^(.*/)index\.php/(.*)") {
return 307 $1$2;
}
}
Q: Certbotの証明書再発行を自動化
A: crontabに毎日certbot renew を実行し、postfixとdovecot を再起動、Nginxの場合
sudo crontab -e
@daily certbot renew --quiet && systemctl reload postfix dovecot nginx
Q: CertbotコマンドでNginxの証明書を発行する
A: sudo certbot --nginx --agree-tos --redirect --hsts --staple-ocsp --email [email protected] -d www.example.com
--nginx: Use the nginx plugin.
--agree-tos: Agree to terms of service.
--redirect: Force HTTPS by 301 redirect.
--hsts: Add the Strict-Transport-Security header to every HTTP response. Forcing browser to always use TLS for the domain. Defends against SSL/TLS Stripping.
--staple-ocsp: Enables OCSP Stapling. A valid OCSP response is stapled to the certificate that the server offers during TLS.
